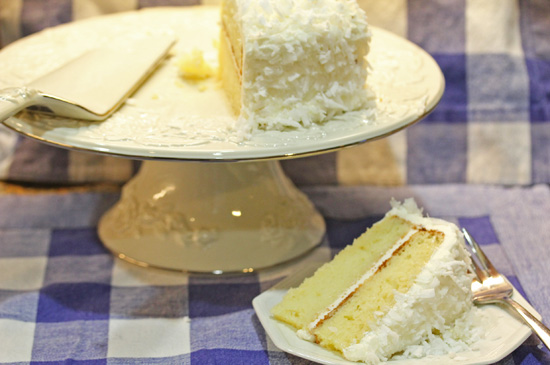
Coconut Cake
Prep 20 mins Bake 30 mins Cool 60 mins Frost 15 mins Eat 2:05 hours
If you’ve never tasted a Coconut Cake made with fresh coconut, you are going to go well…coco-nuts when you do..that is if you are a coconut lover like me. There are coconut lovers or coconut haters – no in between. I love coconut everything, well except coconut water, which I think is lacking in flavor. Give me Thai and Indian food with coconut milk, coconut in my granola, in Chocolate Dream Bars, in my Pina Coladas and the new flavored coconut chips to snack on.
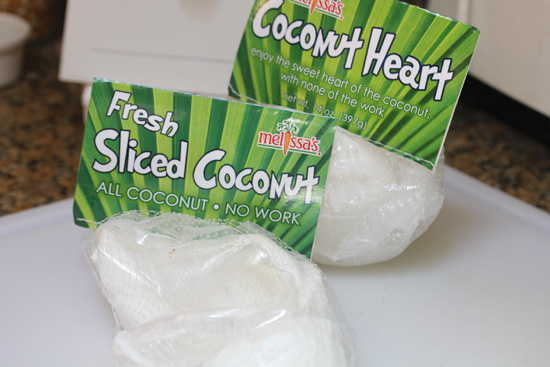
Melissa’s Fresh Sliced Coconut and Coconut Hearts will make a huge difference in your Coconut Cake.
If you are coco-nuts like me, check out the new peeled fresh coconuts from Melissa’s Produce. You’ll never go back to the bagged version for recipes like Coconut Cake again. It comes in two different versions – the whole coconut or sliced. I prefer the sliced, as it is easier to store and you don’t have to mess with the coconut water, which I don’t like anyway.
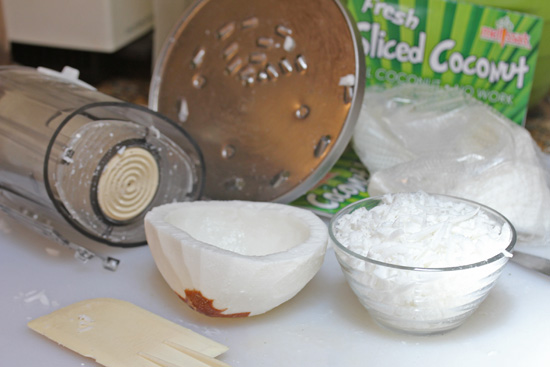
In about four minutes, you will have fresh shredded coconut.
It’s super easy to prepare the fresh coconut for your recipes. In about four minutes, you can have the whole coconut shredded in a food processor, using the shredding disc. And wait until you taste it, OMG, like no other shredded coconut you’ve ever tasted. Making Coconut Cake with fresh coconut is so simple and it’s on a whole other indulgence level.
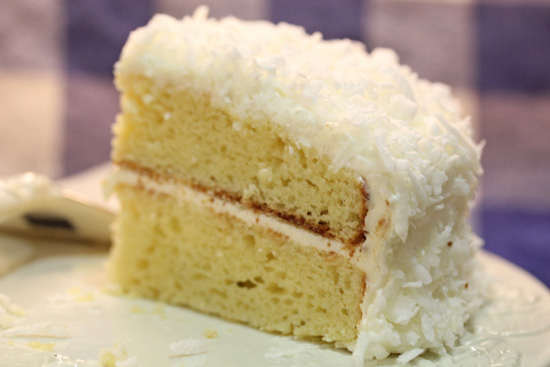
This yellow cake made with coconut cream was delicious.
Make any two or three layer cake you like – white, yellow or chocolate. I made this cake with whole eggs and some coconut cream in the cake. The egg yolks make the cake slightly yellow. It was nice and moist.
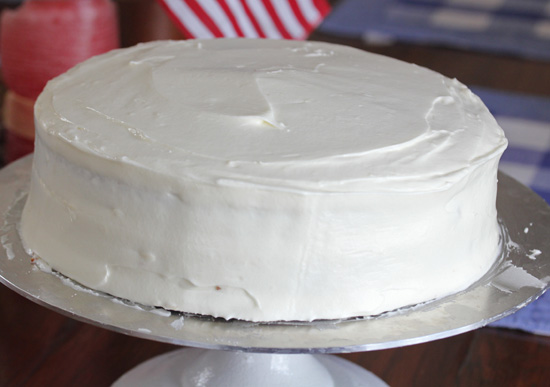
Coconut Cake with Cream Cheese frosting.
You must follow my recipe for the cream cheese frosting. So simple and divine. In culinary school, I learned to frost a cake like a professional. To do this, you need to buy an offset spatula and a revolving cake decorating stand
and some cardboard cake circles
to place under the first layer. My cake stand is a heavy duty professional one from Ateco that I love, but Amazon has other less expensive choices.
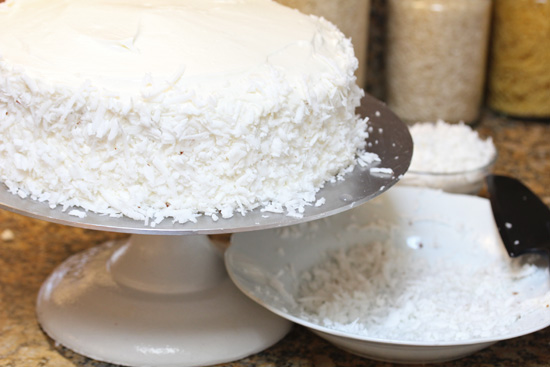
Press fresh shredded coconut into the sides first and then the top of the cake.
To begin, you place about a cup full of prepared frosting on the center top of the first cake layer. Place your offset spatula in the middle of the frosting, keeping it still and twirl the pedestal around as you press into the frosting as it spreads around. Once the cake is covered by frosting nearly to the edge, place the second cake layer on top. Wait to frost the top until the end.
To frost the sides, add a small amount of frosting to the side in various places without pressing too deeply. Now, hold your offset spatula to the side of the cake and twirl the pedestal, while keeping the offset spatula in one place. Add more frosting to the side as needed, twirl the pedestal again.
Finish by adding frosting to the center of the top layer and twirling while the frosting spreads out to the sides. You will want to add more frosting here and there until the cake is completely covered and you are satisfied. Then, begin pressing your fresh coconut into the frosting along the sides and lastly on the top of the cake. Try not to lick your fingers until the end, as it is so delicious. Remember good food safety and wash your hands if you do. Once you are finished decorating, you can carefully move the cake off the revolving cake stand with a large, sturdy metal spatula.
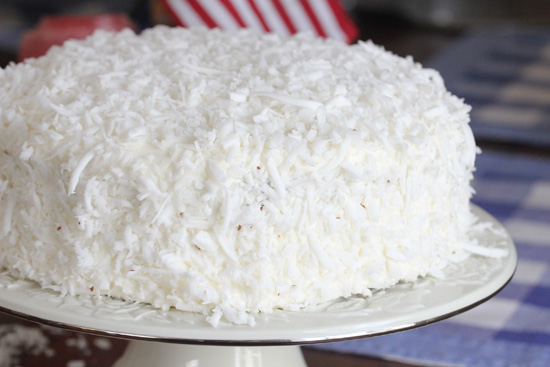
Coconut Cake ready for our party on a fancy cake stand.
I am absolutely coco-nuts about this Coconut Cake. I brought this cake to a party and it was an enormous hit. Make your guests coco-nuts too when they taste this Coconut Cake with fresh coconut for a birthday party or any occasion. Or make cupcakes – a small indulgence where you can freeze some for a later treat.
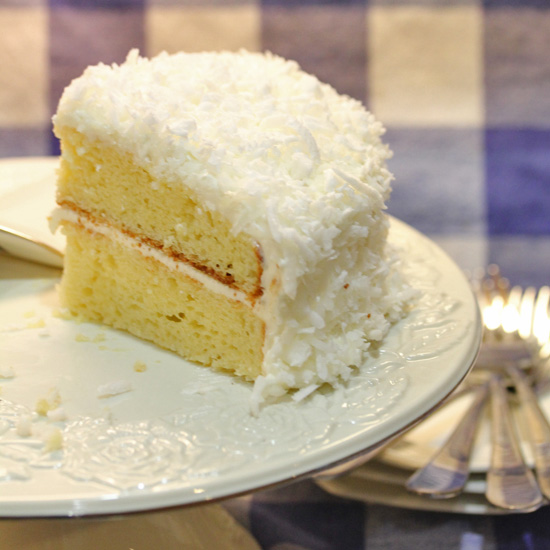
Serve up some Coconut Cake with Melissa’s fresh coconut.
Fresh coconut from Melissa’s Produce is available year round in the produce aisles of better stores like Gelson’s, Bristol Farms on the west coast. Look for it in your neighborhood.
Coconut Layer Cake
2 1/4 cups cake flour, sifted
1 tablespoon baking powder
1 teaspoon salt
1 1/2 cups sugar
3 eggs
1/4 cup vegetable oil
1 cup coconut cream or coconut milk, not coconut water
1 cup sour cream
1 teaspoon vanilla
Cream Cheese Frosting
3 1/2 cups powdered sugar
1/2 cup butter, softened
8 ounces cream cheese, softened
1/2 teaspoon vanilla
pinch salt
1 Fresh Coconut (about 4 cups flaked)
1. Preheat oven to 350°. Trace a round cake pan twice onto a piece of parchment paper. Cut out the circles. Butter and flour two round cake pans and place a round parchment circle in the bottom of each pan. Set aside.
2. Measure dry ingredients for the cake – cake flour, baking powder and salt and set aside.
3. With an electric mixer, beat together the eggs and sugar until well combined, about 3 minutes. Add the oil, coconut cream, sour cream and vanilla and beat until mixture is smooth. In 3 stages, mix the dry mixture into the wet mixture just until combined. Do not overmix, or your cake will not be tender.
4. Pour 1/2 of batter into each prepared pan and bake for 20 minutes or until a toothpick inserted in center of cake comes out clean.
5. While cake is baking, place all frosting ingredients in a mixing bowl and beat with a mixer until fluffy. Mixture should be stiff and creamy. Do not refrigerate frosting or it will be too stiff.
6. Using the shredding disc for a food processor, shred the slices of fresh coconut and set aside.
7. After cake layers have cooled or refrigerated overnight, you can frost your cake. Run a knife around the edge of each cake layer to loosen it up. Have a cake plate or cardboard circle ready and place on top of the first cake layer. Tip it over and with a few short taps, it should fall onto the cake plate or cardboard circle. Simply peel off the parchment and begin to frost.
8. To frost the cake, place about a cup full of prepared frosting on the center top of the first cake layer. Place your offset spatula in the middle of the frosting, keeping it still and twirl the pedestal around as you press into the frosting as it spreads around. Once the cake is covered by frosting nearly to the edge, place the second cake layer on top. Remove parchment paper. Wait to frost the top until the end. To frost the sides, add a small amount of frosting to the side in various places without pressing too deeply. Now, hold your offset spatula to the side of the cake and twirl the pedestal, while keeping the offset spatula in one place. Add more frosting to the side as needed, twirl the pedestal again. Finish by adding frosting to the center of the top layer and twirling while the frosting spreads out to the sides. You will want to add more frosting here and there until the cake is completely covered and you are satisfied.
9. Then, begin pressing your fresh coconut into the frosting along the sides and lastly on the top of the cake. Try not to lick your fingers until the end, as it is so delicious. Remember good food safety and wash your hands if you do.
Servings: 12 – 563 calories per serving
Yield: 2 layer cake
Coconut Layer Cake
Ingredients
- 2 1/4 cups cake flour sifted
- 1 tablespoon baking powder
- 1 teaspoon salt
- 1 1/2 cups sugar
- 3 eggs
- 1/4 cup vegetable oil
- 1 cup coconut cream or coconut milk not coconut water
- 1 cup sour cream
- 1 teaspoon vanilla
Cream Cheese Frosting
- 3 1/2 cups powdered sugar
- 1/2 cup butter softened
- 8 ounces cream cheese softened
- 1/2 teaspoon vanilla
- pinch salt
- 1 Fresh Coconut about 4 cups flaked
Instructions
- Preheat oven to 350°. Trace a round cake pan twice onto a piece of parchment paper. Cut out the circles. Butter and flour two round cake pans and place a round parchment circle in the bottom of each pan. Set aside.
- Measure dry ingredients for the cake - cake flour, baking powder and salt and set aside.
- With an electric mixer, beat together the eggs and sugar until well combined, about 3 minutes. Add the oil, coconut cream, sour cream and vanilla and beat until mixture is smooth. In 3 stages, mix the dry mixture into the wet mixture just until combined. Do not overmix, or your cake will not be tender.
- Pour 1/2 of batter into each prepared pan and bake for 20 minutes or until a toothpick inserted in center of cake comes out clean.
- While cake is baking, place all frosting ingredients in a mixing bowl and beat with a mixer until fluffy. Mixture should be stiff and creamy. Do not refrigerate frosting or it will be too stiff.
- Using the shredding disc for a food processor, shred the slices of fresh coconut and set aside.
- After cake layers have cooled or refrigerated overnight, you can frost your cake. Run a knife around the edge of each cake layer to loosen it up. Have a cake plate or cardboard circle ready and place on top of the first cake layer. Tip it over and with a few short taps, it should fall onto the cake plate or cardboard circle. Simply peel off the parchment and begin to frost.
- To frost the cake, place about a cup full of prepared frosting on the center top of the first cake layer. Place your offset spatula in the middle of the frosting, keeping it still and twirl the pedestal around as you press into the frosting as it spreads around. Once the cake is covered by frosting nearly to the edge, place the second cake layer on top. Remove parchment paper. Wait to frost the top until the end. To frost the sides, add a small amount of frosting to the side in various places without pressing too deeply. Now, hold your offset spatula to the side of the cake and twirl the pedestal, while keeping the offset spatula in one place. Add more frosting to the side as needed, twirl the pedestal again. Finish by adding frosting to the center of the top layer and twirling while the frosting spreads out to the sides. You will want to add more frosting here and there until the cake is completely covered and you are satisfied.
- Then, begin pressing your fresh coconut into the frosting along the sides and lastly on the top of the cake. Try not to lick your fingers until the end, as it is so delicious. Remember good food safety and wash your hands if you do.
- ENJOY THIS RECIPE FROM FreshFoodinaFlash.com

I am a lover of coconut anything. I love that you made the cake out of fresh coconut. This is now on my to-do list. Thanks for the great recipe.
Now I need one of those cake stands! I have a cheap one, but I am a total klutz at frosting cakes. This looks and sounds delicious.
Yes Karen, the Ateco revolving cake stand was a game changer for me when decorating a cake. Once you try it, there is no going back. Be sure to use the offset spatula, a necessary and inexpensive tool. While not completely necessary, the cardboard cake circles make it much easier to move the cake around from platter to platter, particularly if you are taking it out-of-home. A package of 25 will last you awhile too, depending on how many cakes you make.