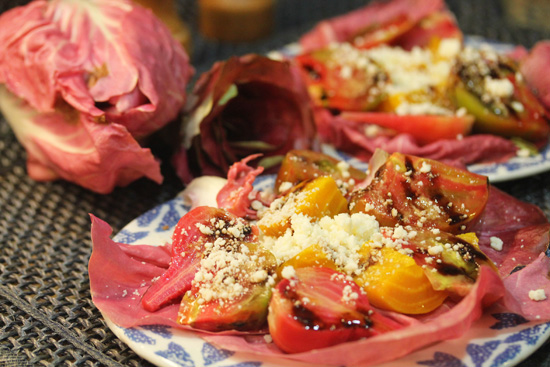
Italian Radicchio Salad with Candy Stripe and Gold Beets and Heirloom Tomatoes.
Have you looked at your refrigerator lately? I mean really look inside all the way to the back and the crevices where dirt lurks? We are all guilty of it. Life gets in the way and before you know it, the stuff in the back is hidden and maybe growing something. It’s January and it’s time to clean out and take inventory with what is left after the holiday rush.
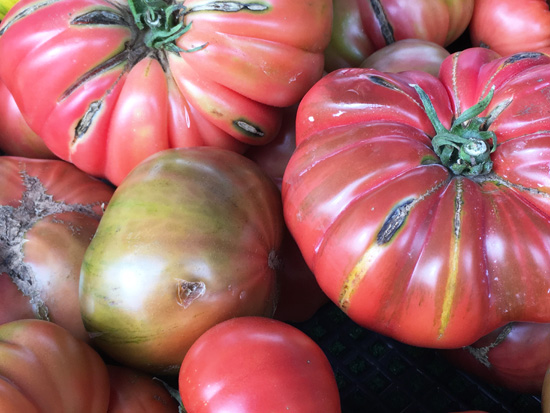
Heirloom Tomatoes at the Santa Monica Farmers Market in January.
A trip to the king of markets, the Santa Monica Farmers’ market and some Melissa’s Produce given to me was the thing that inspired me to clean out. Also, as a food professional, December is absolutely crazy. I counted 13 cooking events I attended or hosted within the space of 23 days where I either brought a potluck dish, hosted a Holiday Cookie class, cooked a major holiday meal, cooked for a group of 50 or so, catered a wedding for 150 people and hosted a New Year’s Eve party. It was fun; I was absolutely thrilled with the results of everything, but by New Year’s Day, I was exhausted. Keeping my refrigerator clean was low on my list and stuff was accumulating.
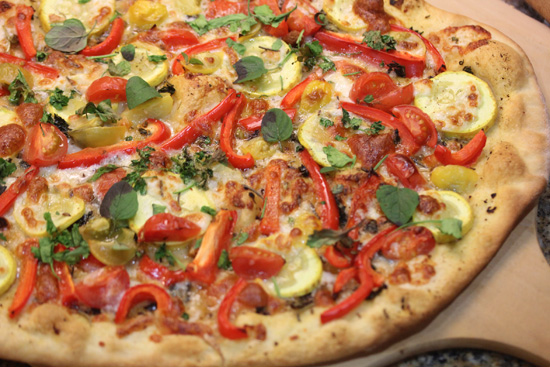
Vegetarian Pizza made from refrigerator finds.
So, what did I find in my refrigerator? Stuff to make a pizza and a salad. I found a yellow squash, red pepper, mozzarella cheese and various herbs to make this delicious pizza. I drizzled the oil remaining in a sun-dried tomato jar on the crust and topped it with the vegetables, the Farmer’s Market cherry tomatoes and shredded mozzarella. To learn how to make a fresh pizza crust, click here.
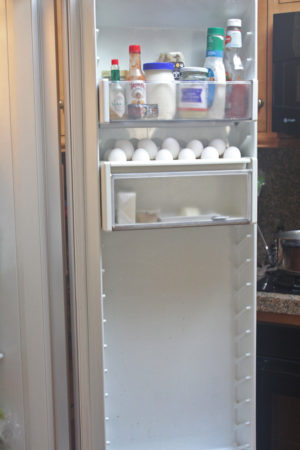
When a shelf becomes near empty, take it out and wash it in the sink.
I don’t clean my refrigerator all at once. I usually clean one shelf at a time. When the fridge starts to become empty, I take out that shelf and put it in the sink and clean it good! Way better than wiping the shelf down. Same with the shelves on the side where the bottles of stuff accumulate. Into the sink and then wipe down the walls of the fridge at the same time. It gives you a chance to take inventory and either throw out or use items on your shelves…OR if you aren’t going to be using something for awhile, put it in a container or a zipper bag for the freezer.
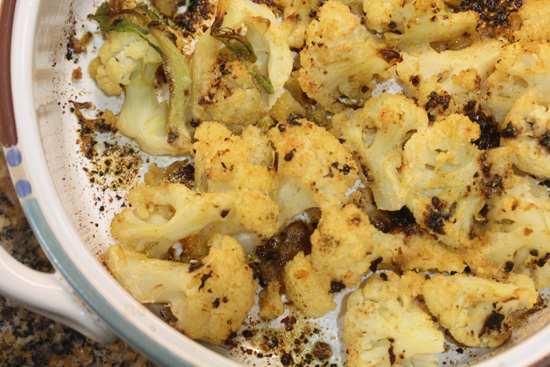
Cauliflower au Gratin – the result of a good refrigerator find.
Not all surprises you find will be bad. If you compost like I do, throwing out produce gone bad means food for the compost bin. Sometimes you find things that are good surprises and allow you to be creative in the kitchen. Like the cauliflower I found in the back. It made a beautiful Cauliflower au Gratin. I simply boiled the cauliflower until it was al dente, drained it, then drizzled the sun-dried tomato oil on it along with grated parmesan (from my freezer) and bread crumbs. Bake it in a 375° oven for about 20 minutes. Yum!
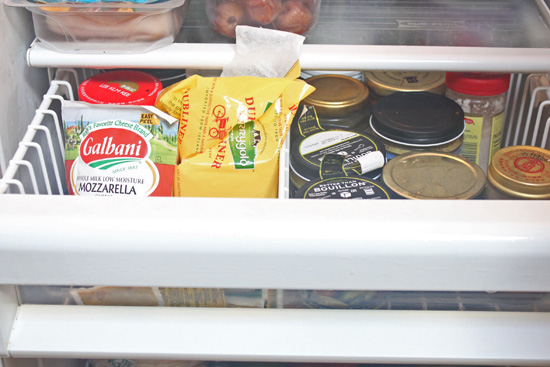
My cheese drawer is a great place to store some small jars too.
A cheese drawer holds…cheese and some smaller jars. Did you know that cheese should be stored in wax paper or the special packaging it comes in – never in a zipper bag? This will let it continue to age without developing mold. Although, I store most leftover cheese in the freezer. That’s what I did with the mozzarella after I made the pizza. I shredded it all and put the remainder in a container for easy defrosting for pizzas and dishes where the cheese is going to melt.
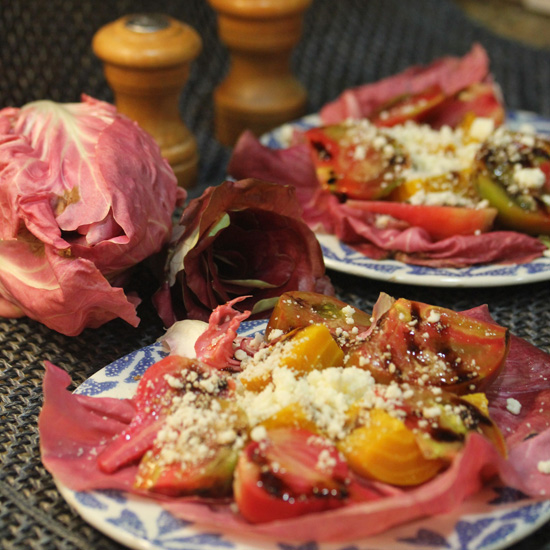
Italian Radicchio Salad with Candy Stripe and Gold Beets, Heirloom Tomatoes, Queso Fresco.
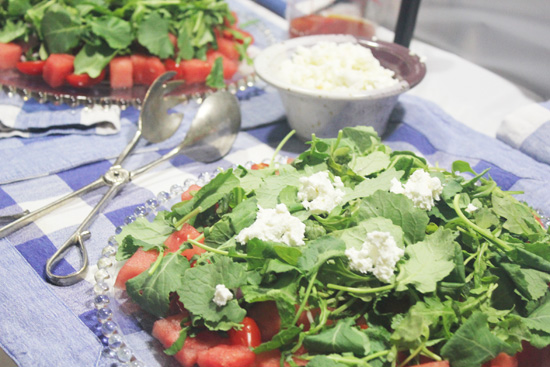
Look at this beautiful salad I was able to put together with the beautiful new Italian Radicchio that Melissa’s Produce gave to me. There were two kinds – La Rosa di Padova and La Rosa di Veneto. The flavor was milder than I expected, since radicchio has a more bitter flavor. Look for these new varieties to show up at fine supermarkets soon. I topped the radicchio with some Candy Stripe and Gold Beets, the unbelievable January?! Heirloom Tomatoes grown in San Diego county and some leftover queso fresco found in my freezer. To make the flavors shine, I drizzled basil olive oil and a fig balsamic drizzle I found in the fridge over the salad.
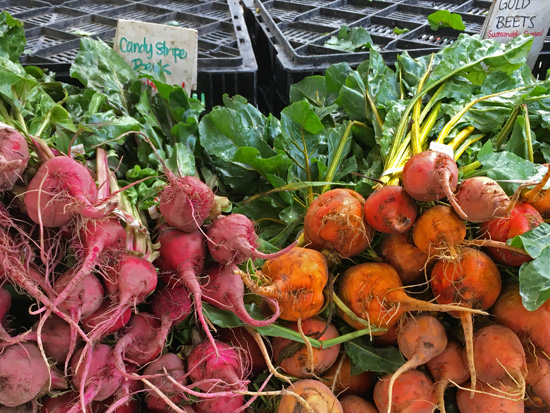
Candy Stripe and Gold Beets at Santa Monica Farmers Market.
I purchased the Candy Stripe and Gold Beets at the Wednesday Santa Monica Farmers’ Market, saving the beet greens for other recipes. Here’s one use for beet greens: Beet Greens with Caramelized Onions and Brussell Sprouts.
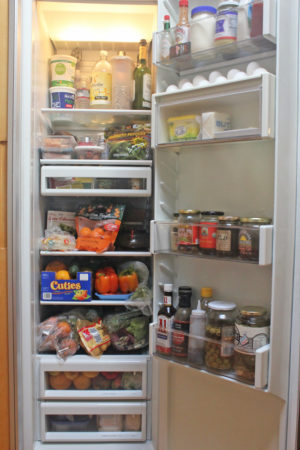
My Subzero Refrigerator looks clean and organized after my January clean out.
Refrigerator storage is a tricky thing. I accumulate the plastic boxes that food comes in, wash them out and reuse in the fridge. A large lettuce box now holds my romaine lettuce, some green onions and cilantro. Another cardboard box holds fruit that can’t fit in my produce drawer. These work way better than the clear plastic bags, where the produce gets trapped and can’t breathe…and I can see what’s inside of them too. Clear plastic boxes with holes are great for storage of produce that needs to breathe like green beans or Brussels Sprouts.
There is always a gourmet meal in the waiting when you clean the refrigerator and put your finds on the counter. Use your creativity to come up with something new and exciting or just “google” your ingredients and see what recipes you get. With the internet and all the wonderful food blogs like “Fresh Food in a Flash” at your fingertips, the world is your “oyster” or a dinner and a clean fridge away.
Print this Recipe. To see step by step pictures for making pizza dough, click here.
Basic Pizza Dough
You can make this dough in one minute in the food processor – really! If you use Rapid Rise yeast, you can shorten the rising to 30 minutes, making this a totally doable pizza to make after a busy day. This recipe will make 3 10″ crusts or 2 thicker crusts. I roll it out with a rolling pin, but if you are comfortable as a pizzeria king to stretch and spin it, go for it! If you are making a lot of pizzas and have only one pizza peel, you can make your pizzas on parchment paper. Reduce oven temperature to 450° to prevent parchment from burning, sprinkle cornmeal onto parchment paper, then place rolled out dough on parchment paper and add pizza toppings. Scoop up pizza with your peel under the parchment paper and slide onto to the hot pizza stone.
1 Tb yeast or 1 package (could use Rapid Rise)
2 tsp sugar
3 cups + all-purpose flour
1 Tb olive oil
1 tsp salt
1 warm water
1 Tb Cornmeal as needed
Parchment paper (not wax paper)
1. Place your baking stone into an oven and preheat to 500 or 450 degrees (if you are using parchment paper). You want the stone really hot to achieve the best browning on the bottom.
2. Measure flour into bowl of food processor. Place the yeast and sugar together and place the salt and olive oil on the other side of the bowl. Add 1/2 cup warm water to yeast to begin to activate it. Bubbles will begin to form in the yeast mixture. If using food processor, with motor running, add enough warm water to bring all ingredients together into a moist, but not wet ball. If mixture is too dry, add more water. If mixture is not coming together, then add more flour, a little at a time. Oil your fingers when working with dough to prevent sticking.
3. Divide dough into 2 or 3 equal pieces and form them into discs. Place your discs of dough on an oiled tray and cover with plastic wrap. Leave in a warm place to rise until double its size – about 45 minutes or an hour. (If using Rapid Rise, it should be ready in about 30 minutes.) You can leave it sit longer to develop more flavor and then continue to punch down the dough and let it rise. Or you can place in refrigerator and bring up to room temperature the next day before using.
4. To use, place dough on a well floured surface and roll it out with a rolling pin. Turn the dough a 1/4 turn after each roll and reflour surface frequently to prevent sticking.
5. You are ready to top your pizza. Sprinkle cornmeal generously on your pizza paddle or place parchment paper on paddle, if using. Place dough circle on paddle. Top with your favorite toppings – minimize liquid in your ingredients for maximum success and best browning of bottom.
6. Slide your pizza from the paddle onto the hot pizza stone in the oven and bake about 6 minutes (longer for a thicker crust) or until the cheese just begins to brown.
Servings: 6
Preparation Time: 11 minutes
Cooking Time: 6 minutes
Inactive Time: 30 minutes
Total Time: 47 minutes
One Minute Pizza Dough
Ingredients
- 3 cups + all purpose flour
- 1 Tablespoon or 1 package yeast use Rapid Rise
- 2 teaspoons sugar
- 1 Tablespoon olive oil
- 1 teaspoon salt
- 1 warm water
- 1 Tablespoon Cornmeal or semolina flour as needed
- Parchment paper not wax paper
Instructions
- Place your baking stone into an oven and preheat to 450°. To achieve a brown crust, place the baking stone on the lowest oven rack close to the heating element. You also want the stone really hot to achieve the best browning on the bottom.
- Measure flour into bowl of food processor. Place the yeast and sugar together atop the flour and place the salt and olive oil on the other side of the bowl. Add 1/2 cup warm water to yeast to begin to activate it. Bubbles will begin to form in the yeast mixture. If using food processor, with motor running, add enough warm water to bring all ingredients together into a moist, but not wet ball. If mixture is too dry, add more water. If mixture is not coming together, then add more flour, a little at a time. Dump the dough onto an oiled baking sheet. Oil your fingers when working with dough to prevent sticking.
- Divide dough into 2 or 3 equal pieces and form them into discs. Place your discs of dough on an oiled tray and cover with plastic wrap. Leave in a warm place to rise until double its size. If using Rapid Rise, it should be ready in about 30 minutes or less. (Standard yeast may take double the time.) You can leave it sit longer to develop more flavor and then continue to punch down the dough and let it rise. Or you can place in refrigerator and bring up to room temperature. the next day before using.
- Place dough on a well floured surface and roll it out with a rolling pin. Turn the dough a 1/4 turn after each roll and reflour surface frequently to prevent sticking.
- You are ready to top your pizza. Place parchment paper on counter. Sprinkle cornmeal or semolina flour over the parchment paper. Place dough circle on parchment. Top with your favorite toppings - minimize liquid in your ingredients for maximum success and best browning of bottom. Scoop up the pizza by sliding the pizza paddle or a flat cookie sheet under the parchment paper.
- Slide your pizza from the paddle onto the hot pizza stone in the oven and bake about 6 minutes (longer for a thicker crust) or until the cheese just begins to brown. Midway through the baking, pull the parchment paper out from under the crust and let it sit directly on the stone so it will brown.
- ENJOY THIS RECIPE FROM FRESHFOODINAFLASH.COM





Great tips on cleaning your refrigerator. It is a good reminder for me.
That salad is so gorgeous!
I’m pretty sure my pantry could use a clean up too! This is such a great idea! Thanks!
I know…I clean out a shelf at a time in my pantry too. We forget about what’s in there and it’s a good reminder when you clean it out!